
Serene, calm and ethereal there’s something magical about a milk bath maternity photo shoot. More and more mums-to-be are booking professional milk bath maternity photo shoots – while others are taking them in their own bathrooms.
Here’s how to create your own maternity milk bath photos, and top tips from a Mum’s Grapevine mum who enlisted a friend to help with a DIY photo session.
Best time to do a milk bath maternity shoot

Before anything else, you need to pick the right time in your pregnancy to take the photos. Between 32 and 34 weeks is ideal. Your bump is well and truly on show, and you’re still able to move around in the bath reasonably comfortably. (image: Tiffany Burke Photography)
Find a friend

Get a trusted friend in to help with your DIY shoot – someone who is comfortable with you being in the bath, not wearing much at all! They also need to be able to help you in and out of the bath safely and be comfortable taking photos. (image: Jessica Q Photography)
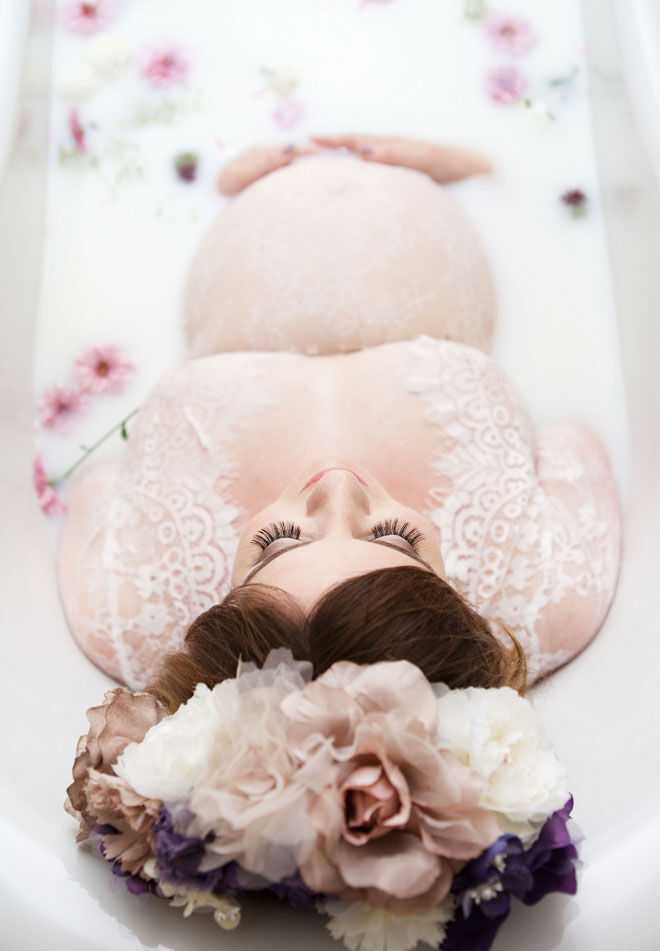
What to put in the bath

Most mums-to-be go for flowers, but fruit and even cereal like Froot Loops make interesting additions to the bath. When choosing flowers, think about how the colours look against the white of the bath water.
To get the bath to the desired colour, pour in whole milk until you’re happy. Some women prefer the water to be more opaque, while others like the bath to be very white.
And remember to test the temperature of the water, to hot and the flowers will wilt quickly, too cold and you’ll be covered in goosebumps. (image: Antwon Maxwell Photography)
What to wear

Lacey and sheer dresses and fabrics are a milk bath favourite. Snug fitting dresses work best so that your curves and bumps can be on show. While white lace looks serene and stunning, coloured dresses also create a beautiful contrast against the white bathwater. (image: Kate & Ryan Photography)
Think about angles

Get your photographer to think about angles. While you remain in one position, they move around and capture images from above, just of your belly, from your view, and from the other end of the bath. (image: Pouting in Heels)
Strike a pose

Try and strike a few different poses – this legs up image is super cute! Also try moving from your side to your back, onto your knees and with your hair in or out of the water.
A mum’s guide to DIY milk bath maternity photos

Mum’s Grapevine Due Date Group member Laura Brouwer created her own milk bath maternity shoot at home with friend Kimberley Blandford – and the results are beautiful.
Here’s how she did it:
The setting: For maternity, you are likely limited to shooting indoors which poses tricky lighting situations. Our bathroom does not have a lot of natural light and our bath is situated directly under a window which casts a shadow.
If you have a camera with external or off-camera flash bounce the light towards the ceiling to fill the room with as much light as possible. This will help to achieve a whiter look to the milk in the bath. If your flash is directed at the bathwater it will create reflection and uneven light. Also, choose the right time of day when the shadows fall in a pleasing way or the room is filled with as much light as possible. In preparation for the photo shoot snap a shot of your bath at different times of the day to compare. Bright day vs overcast will also affect the results.

The set up: I have practiced using both artificial and real flowers and whilst both are challenging real flowers are much easier to work with. They will sink over time if disturbed but are somewhat buoyant whereas artificial will sink straight away – unless they have foam attached underneath and then only if lightweight. My tip is to invest in some lovely fresh flowers on the day you intend to take the photos.
Run a nice warm bath to the level you are after, making sure that the areas you want to accentuate are above the surface. Be aware of ‘cutting off’ limbs like legs and arms at awkward looking points. Add the milk once the bath is turned off. I used 9L of full cream milk. You may also add powdered milk to intensify the white. This can be added bit by bit until the desired result is achieved.
The shots: Take photos from as many different angles as your space will allow. Straight on, straight above, perspective etc. If you have tiles just be aware of the effect that lines create. In our bathroom, we have white tiles with dark grout so where possible I try to make sure that those prominent lines are straight so as not to distract from the subject.
Alternatively, if you have the space to move around you can get creative and use those leading lines to draw the eye into the subject. Take lots of photos. You never know what is going to grab you when editing.

Post-processing: I use Lightroom to edit images but keep it very basic. For these images you want the milk to look as white as possible so first I adjust the exposure if needed then simply increase the level of white, decrease highlights, often decrease shadows, increase blacks slightly to create a little contrast. If I’m doing a quick edit on my iPhone I’ll usually just use the ‘light’ slider until it looks good or I will increase exposure and brightness to bring out the white.
Want some other maternity bath photo ideas? Here are 11 things to put in the bath for a pregnancy photo shoot.
(Feature image: Griot Photo)


